Decadent Chocolate Pudding Pots You’ll Love to Savor
Chocolate Pudding Pots save me on those nights when I want something rich and silky, but I do not want to fuss with a complicated dessert. Maybe you are the same way. You cooked a cozy dinner, set the table, and now you want that final sweet touch that makes everyone sigh happily. If you are planning a hearty main like this crowd-pleasing cranberry pot roast, these little pots of joy balance the meal with a smooth, chocolatey finish. They are simple, make-ahead friendly, and they look fancy without any drama.
Why is this recipe better?
I have made more puddings than I can count, and I keep coming back to this one for a few solid reasons. First, it is stovetop simple. No tempering eggs, no thick layers to set overnight. Just a gentle cook, a good whisk, and a rest in the fridge. Second, it is not too sweet. The chocolate flavor leads, then the creaminess follows. You get that deep cocoa hit without the sugar crash. Third, it is reliable. You can make it in the morning for dinner, or even the night before. It sets beautifully, travels well in jars, and always earns compliments.
Texture matters with Chocolate Pudding Pots. This version lands right between luscious and light. It is creamy enough to feel special, but not so dense that two bites do you in. A touch of butter at the end adds a satiny finish. Vanilla rounds the flavor, and just a pinch of salt wakes up the chocolate so it tastes fuller and more complex.
It is also adaptable. Want it darker? Choose a higher cocoa percentage. Craving something gentler? Go with semi-sweet. You can stir in espresso powder for a mocha vibe, or add orange zest for a citrus lift. I have even folded in a spoonful of peanut butter for a salty-sweet twist. It never lets me down.
“I made these for a dinner with friends and my pickiest eater asked for seconds. Smooth, rich, and not too sweet. Total keeper.”
How to make Chocolate Pudding Pots
Ingredients
- 2 cups whole milk, divided
- 1 cup heavy cream
- 4 tablespoons cornstarch
- 1/2 cup granulated sugar
- 1/4 teaspoon fine sea salt
- 6 ounces chopped chocolate, 60 to 70 percent cacao recommended
- 2 tablespoons unsalted butter
- 1 teaspoon pure vanilla extract
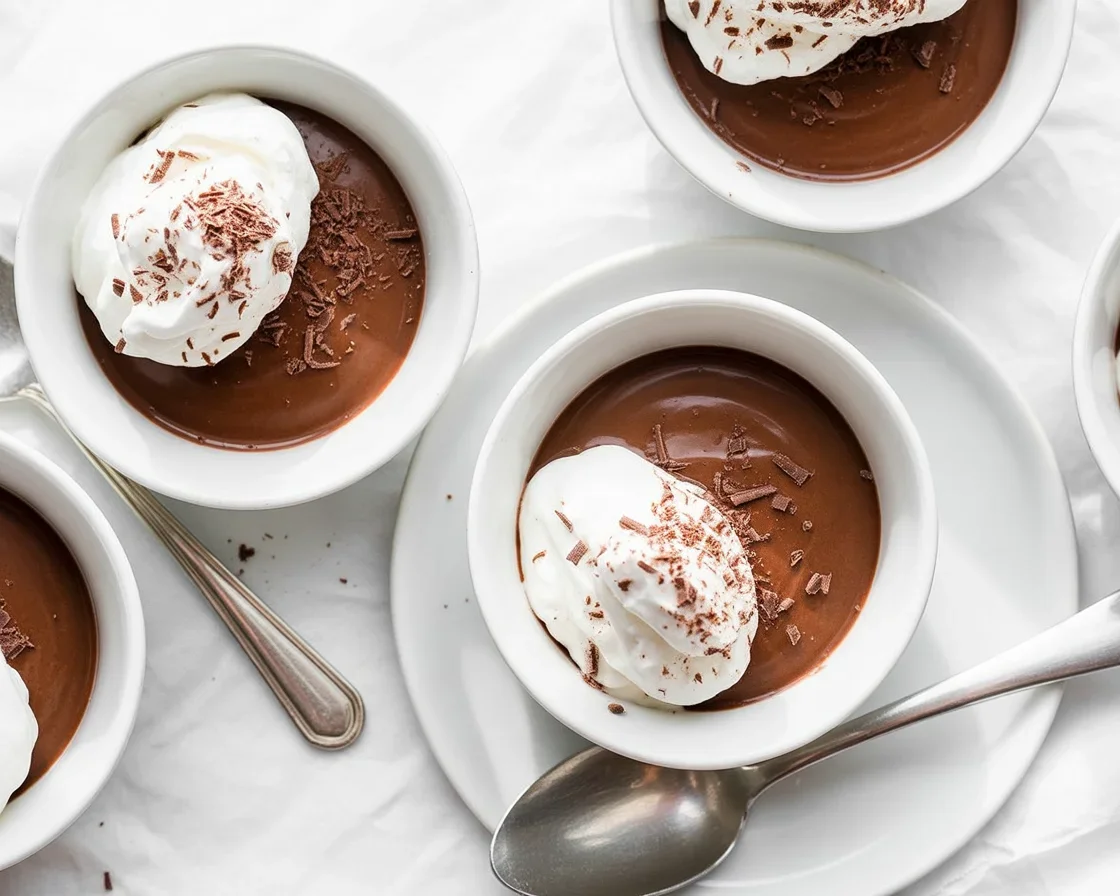
- Optional toppers: lightly sweetened whipped cream, shaved chocolate, crushed cookies, fresh berries
Equipment
Use a medium heavy-bottomed saucepan so the milk heats evenly, a whisk for constant stirring, a rubber spatula to get into the corners, and 6 to 8 small jars or ramekins. A fine-mesh strainer helps if you want the absolute smoothest finish, though it is optional.
Step-by-step
1. In a bowl, whisk 1/2 cup of the milk with the cornstarch until smooth. No lumps. This slurry is your insurance for a silky set.
2. In your saucepan, combine remaining milk, cream, sugar, and salt. Warm over medium heat until steaming. Do not boil. You want it hot enough to dissolve the sugar and activate the cornstarch later.
3. Whisk in the cornstarch slurry. Keep the heat at medium and whisk constantly. The mixture will look thin for a minute, then it will begin to thicken. Let it bubble gently for 1 to 2 minutes. That little cook time is what sets the pudding later.
4. Remove from the heat and add the chopped chocolate. Let it sit for 30 seconds to melt, then whisk until fully smooth and glossy.
5. Whisk in butter and vanilla. Taste. If your chocolate is very dark, you can add an extra teaspoon of sugar. If it needs clarity, a tiny extra pinch of salt helps. Keep flavors balanced, not cloying.
6. For extra-smooth results, strain the pudding through a fine-mesh sieve into a large measuring cup with a spout. This catches any tiny bits and makes pouring easier.
7. Divide into jars or ramekins. Press a small piece of plastic wrap directly onto the surface if you want to avoid any skin. Chill until set, at least 2 hours. They get even better after 4. Right before serving, top with whipped cream, berries, or a simple sprinkle of shaved chocolate.
Quick tip: If your pudding thickens too much on the stove, whisk in a splash of warm milk to loosen. If it seems thin after 2 hours, give it more time. It firms as it cools.
Make-ahead and storage
These pots keep for 3 to 4 days in the fridge. Cover tightly. Add toppings right before serving so they stay crisp and fresh. They are also easy to transport, which makes them perfect for potlucks or dinner at a friend’s place.
Chocolate types FAQ
Choosing the right chocolate is what takes these from good to unforgettable. I like 60 to 70 percent because it delivers a bold cocoa flavor without bitterness. If you love very dark chocolate, 72 percent works well. Just taste the warm pudding and adjust with a bit of sugar if needed.
Milk chocolate will give you a softer, sweeter pot. Reduce the sugar by a tablespoon or two so it does not tip too sweet. Semi-sweet is a happy medium for mixed crowds. The key is quality. Use bars or coins meant for eating, not baking chips that have stabilizers. Better chocolate melts cleaner and tastes smoother.
What about cocoa powder? You can add a tablespoon for a stronger cocoa note, but do not swap it for the solid chocolate. The fat in chocolate creates that silky texture we all want in Chocolate Pudding Pots, while cocoa alone can taste a little dry or chalky.
Salt matters too. Just a pinch makes the chocolate taste more like chocolate. And vanilla should be real if you can swing it. It brings roundness without taking over.
Watch this video to see how easy it is to make these Chocolate Pudding Pots with Cookie Crumb Dirt…
No complicated techniques here. The video walks you through heating the milk gently, whisking the cornstarch slurry into the pot, and stirring in chocolate off the heat. You will also see how to layer cookie crumbs for a fun dirt cup effect. If you want to adapt the mousse approach for this pudding, try topping each cup with a thin layer of crushed chocolate cookies and a dollop of softly whipped cream. It gives contrast without extra work.
When watching, note the pace. Low to medium heat is your friend. Stir patiently so nothing scorches on the bottom of the pan. If you see steam, that is fine. If it starts boiling hard, nudge the heat down. The goal is a steady thickening, not a rolling boil.
More dinner-party individual serving desserts
Individual desserts always feel a little special. They are practical too. You can portion ahead, set them on a tray, and bring them to the table with zero mess. Alongside your Chocolate Pudding Pots, consider mini lemon cheesecakes in muffin cups, tiramisu layered in small glasses, or strawberry shortcake in jars with vanilla cake cubes and macerated berries.
I also love simple fruit pots. Toss sliced peaches or nectarines with a squeeze of lemon and a teaspoon of sugar, then chill. Spoon over Greek yogurt and top with toasted almonds. Or try a quick raspberry compote with a splash of balsamic and pile it on vanilla ice cream. Keep it easy. Keep it bright.
For texture contrast, try a crunchy topper bar. Set out bowls of crushed cookies, toasted coconut, chopped nuts, and mini chocolate chips. Let everyone finish their own cup. It turns dessert into a tiny DIY moment that guests remember.
Common Questions for Chocolate Pudding Pots
How many servings does this make?
This recipe makes 6 to 8 small pots depending on your jars. I aim for about 1/2 cup per serving, which feels just right after a full meal.
Can I make dairy-free pudding?
Yes. Use full-fat canned coconut milk for richness and a dairy-free chocolate you love. Note that texture may be slightly softer. Chill well for the best set.
What if my pudding is lumpy?
Strain it through a fine-mesh sieve while warm. You can also blend gently with an immersion blender for 10 seconds. Next time, whisk more consistently and keep the heat medium.
Is cornstarch necessary?
It is the easiest thickener here. You can use arrowroot in the same amount, but the texture will be a bit more glossy. Both work.
How long do they need to chill?
At least 2 hours. Four hours is ideal for a clean, firm set that still tastes silky.
A sweet little wrap-up
There is something quietly perfect about a chilled pot of chocolate after dinner. These Chocolate Pudding Pots are simple to make, easy to serve, and flexible enough to fit any mood. Choose good chocolate, whisk gently, chill long enough, and you are golden. If you are curious to try similar styles, you might enjoy this creamy version from Hot Chocolate Pots – Marcellina In Cucina or the classic take from Chocolate Pudding Pots – RecipeTin Eats. Now grab a whisk, heat some milk, and treat yourself to a spoonful of something rich and lovely tonight.
Chocolate Pudding Pots
Ingredients
Method
- In a bowl, whisk 1/2 cup of the milk with the cornstarch until smooth.
- In a saucepan, combine remaining milk, cream, sugar, and salt. Warm over medium heat until steaming, but don’t boil.
- Whisk in the cornstarch slurry and keep whisking over medium heat. Let it bubble gently for 1 to 2 minutes.
- Remove from heat and add the chopped chocolate. Let sit for 30 seconds, then whisk until smooth.
- Whisk in butter and vanilla. Taste and adjust with sugar or salt if necessary.
- Strain the pudding through a fine-mesh sieve into a large measuring cup with a spout, if desired.
- Divide the pudding into jars or ramekins. Cover the surface with plastic wrap to avoid skin formation.
- Chill until set, at least 2 hours (4 hours is ideal).
- Top with whipped cream, berries, or shaved chocolate right before serving.